Ever experience tightness or pain in your shoulders? Not just after a hard training session but even after sitting for a long time? Unfortunately, due to desk jobs and an increasingly inactive population, shoulder pain is not uncommon. Fortunately, we’ve got the tools to help you overcome it. Read on to find out which mobility exercises will give your shoulders a whole new range of motion and why it’s time to loosen up.
Before we guide you through the exercises, here’s why shoulder mobility is so important – not just for an athlete but for everyone in everyday life:
- By working on improving your mobility, you’re actually doing your shoulder joint and ligaments a huge favour. This saves them from things like early joint wear.
- Hard shoulder-focused training sessions or hours of sitting can harden the muscles in your shoulder area. Mobility exercises work on loosening these muscles and bringing your shoulders back into a good and healthy position.
- Mobilizing your shoulders highly improves the execution and performance in exercises such as jumping jacks, incline rows, pushups or pullups. What’s most important is that it can also prevent you from suffering an injury.
Now you know “why”, it’s time to find out “how”. Here are our top shoulder mobility exercises:
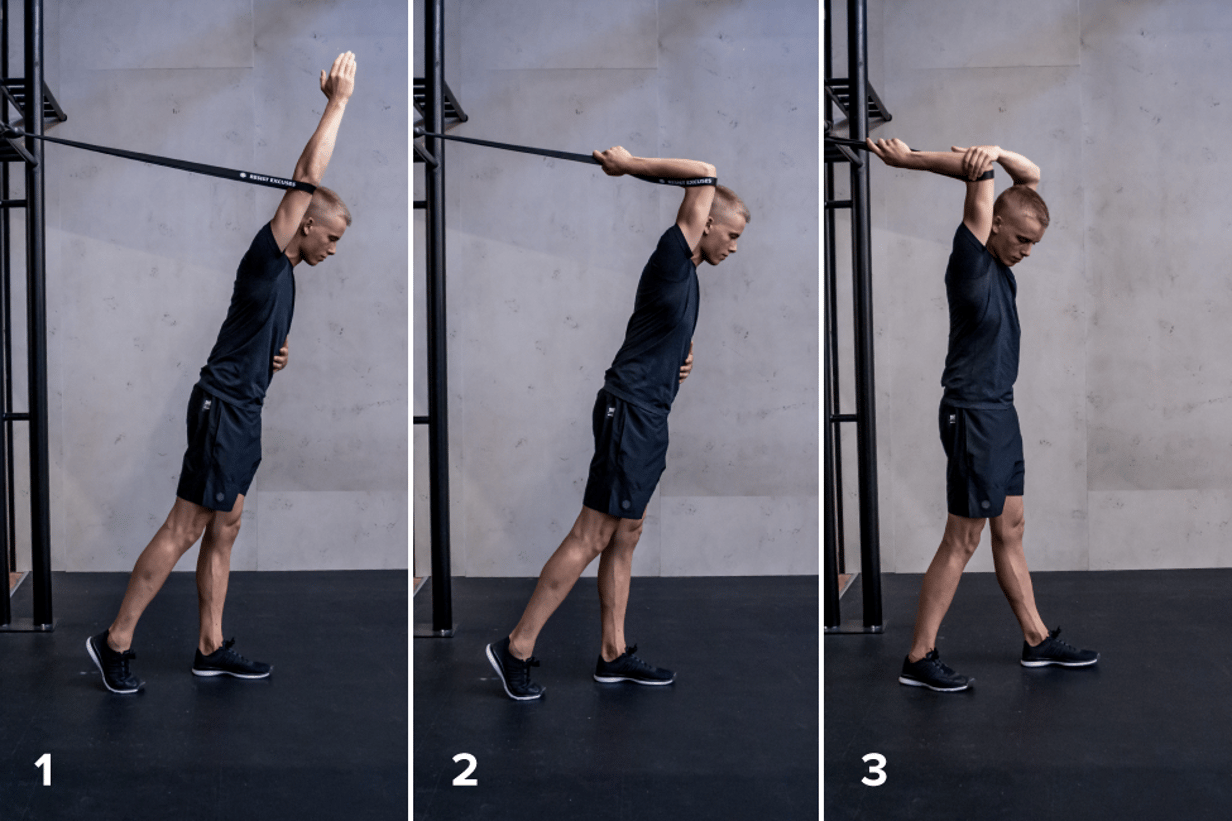
Exercise 1
- Put your elevated right arm through the resistance band so it sits directly above the elbow on your upper arm.
- Bending your arm, grip the resistance band with your right hand, simultaneously pulling the shoulder apart. What’s crucial here is that you squeeze your abs and glutes, holding your spine and rib cage in a neutral position (no overextension of the spine). By leaning forwards you can open up your shoulder joint.
- To intensify the mobilization of the shoulder joint, grab your right elbow with your left hand, pulling your right arm towards your right ear.
- Hold for 60-90 of seconds and repeat on both sides.
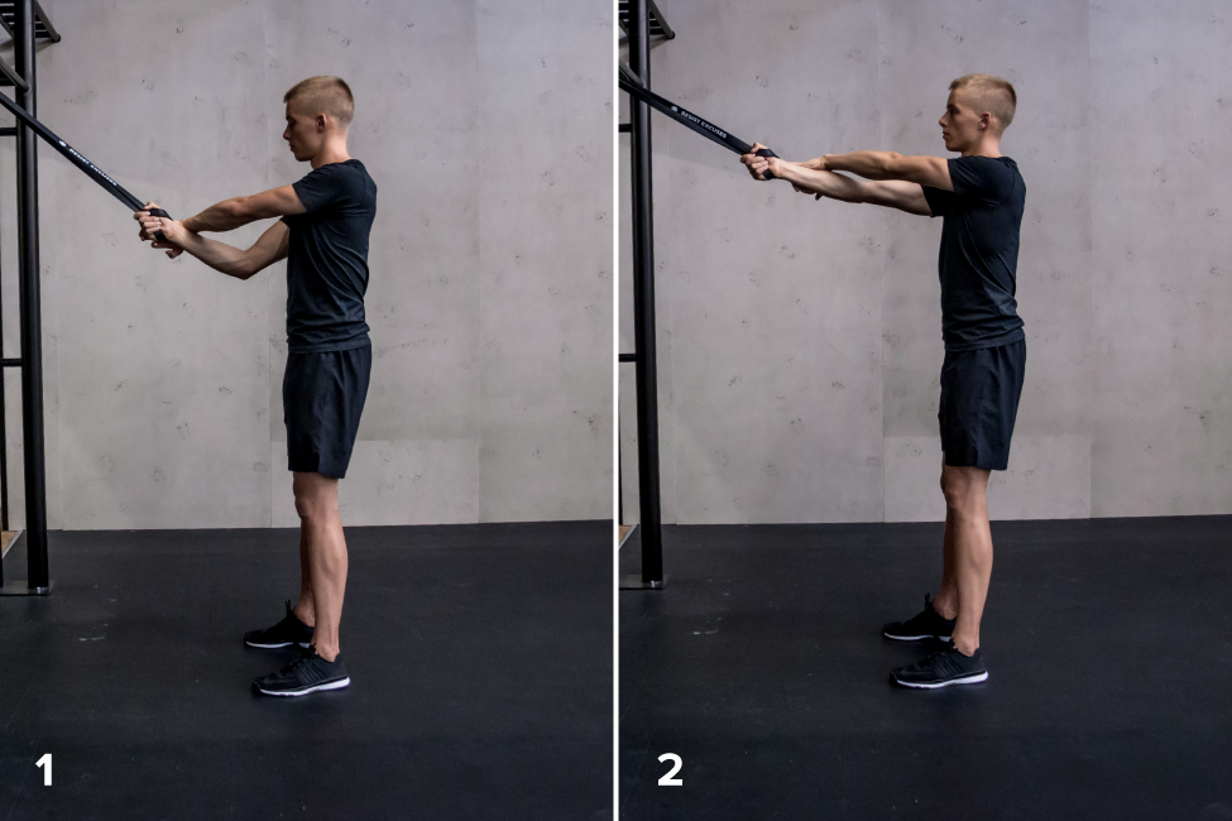
Exercise 2
- Put your right wrist through the loop of the resistance band and grip it with your hand. By just holding the resistance band without the loop you will not be able to create enough tension during the mobility exercise.
- By stretching out your arm and rotating it slightly so that your palm faces upwards, you are bringing your shoulder into a good and healthy (externally rotated) position.
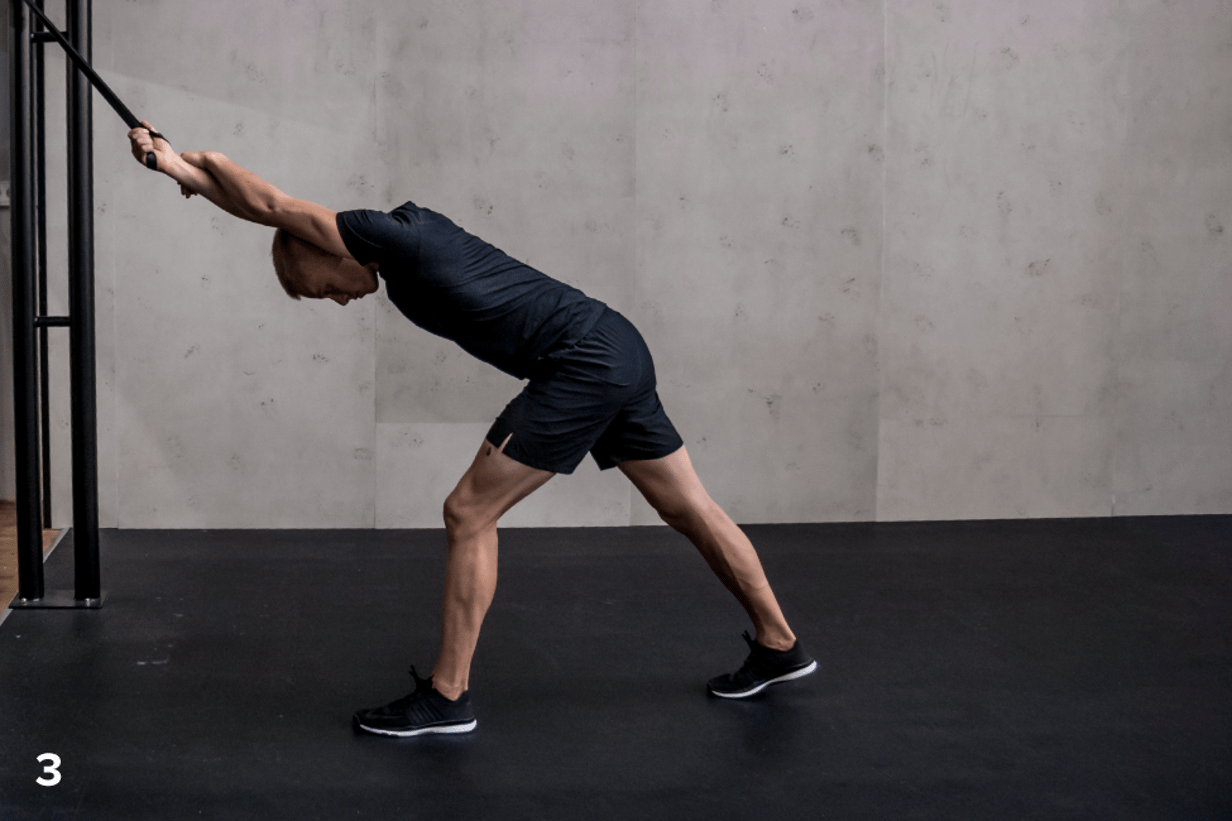
- Holding your shoulder in this position, step back with one foot, lean your upper body forwards and push your hips backwards. Your arm remains externally rotated above your head. The lower you go, the more you increase the mobilization (and stretch) in the shoulder joint.
- Hold for 60-90 of seconds and repeat on both sides.
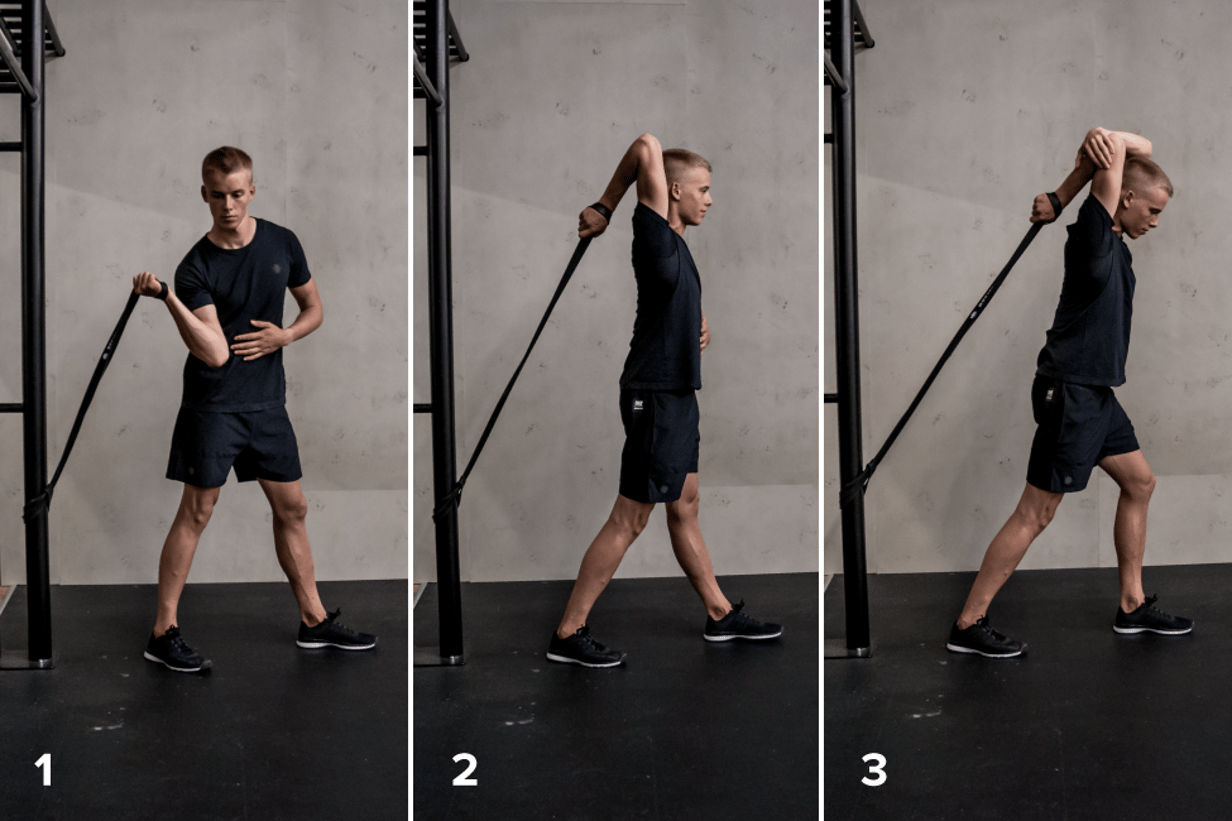
Exercise 3
- This time, secure your resistance band lower down. Loop your wrist through the band and grip it with your palm facing upwards. This takes your shoulder into an external rotation. Step forwards with one foot and turn your body away from the resistance band.
- Then, straighten your upper body, raise your arm and bend it over your back. This puts the shoulder under tension. What’s important here is that you keep a neutral spine by squeezing your abs and your glutes.
- Grab your right elbow with your left hand and pull it towards your right ear. Lean forwards to increase the stretch and the mobilization of your shoulder joint.
- Hold for 60-90 of seconds and repeat on both sides.
Let’s recap
Although these exercises might look the same, each serves a different purpose. By altering the position of the resistance band, you create different stimulus on the shoulder joint. This is just as important as varying your training exercises, so you keep on challenging your body. Varying the stimuli will get you greater results rather than just using repeating the same exercise over again.